Campaigns
Workflows
Workflows define how an agentic campaign runs through nodes, including messages, channels, wait times, and signal-based branches.
A workflow is the sequence of steps 1eyeᴬᴵ follows to engage target contacts from a Target List. It controls which channel is used, what message is sent, who sends it, how long to wait, which signals to check, and what happens next.
Use Workflows to build campaign logic across Email, LinkedIn, and iMessage.
What Workflows are for
Workflows help your team answer:
A campaign workflow can send messages, wait between steps, check signals, branch based on activity, and stop when the campaign reaches an end state.
Use Workflows to:
Send email messages
Send LinkedIn connection requests
Send LinkedIn messages
Send iMessages or SMS fallback messages
Add wait time between steps
Check signals
Branch into Yes or No paths
Personalize messages by ICP
Personalize messages by persona
End the campaign path cleanly
How Workflows work

A workflow usually starts with a Start node and ends with an End node.
Between Start and End, you can add action nodes and signal nodes.
Example:
This lets 1eyeᴬᴵ run a structured sequence instead of sending one-off messages.
Workflow canvas
The Workflow tab gives you a visual canvas for campaign logic.
On the canvas, you can:
View all workflow nodes
Add new nodes
Select a node to configure it
Connect steps in order
Add waits
Add signal conditions
Branch paths
Save workflow changes
Open the Console when the campaign is running
Each node represents one step in the campaign.
Workflow nodes
Common workflow nodes include:
Node | What it does |
|---|---|
Start | Begins the workflow for the target list. |
Sends an email from a connected mailbox. | |
Sends a LinkedIn connection request or message from a connected LinkedIn account. | |
iMessage | Sends an iMessage or SMS fallback from a connected iMessage line. |
Signal | Checks whether a condition happened. |
End | Ends the workflow path. |
Only channels that are enabled and connected will be available for channel nodes.
Start node

The Start node begins the campaign workflow.
It represents the entry point for target contacts in the selected Target List.
The Start node is usually created automatically when the campaign workflow is created.
Use the Start node to understand which campaign or target list the workflow is attached to.
End node
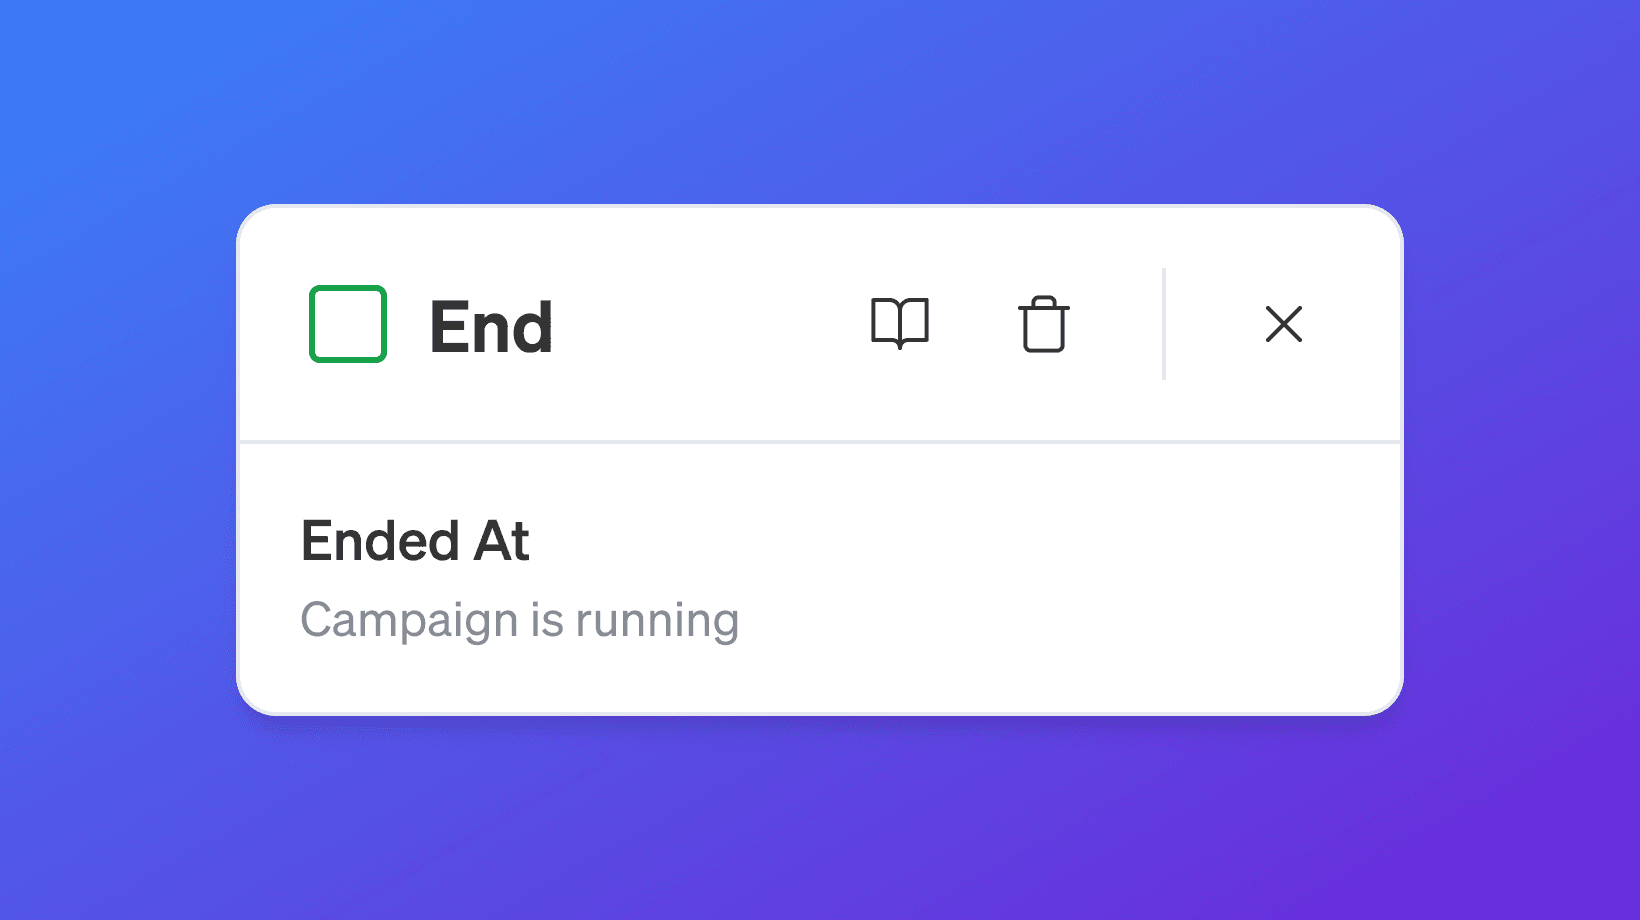
The End node stops the workflow path.
A contact reaches End when there are no more steps for that path.
Use End nodes to close the campaign flow after:
A final message
A completed branch
A signal condition path
A follow-up sequence
A no-action path
Every workflow path should eventually lead to an End node.
Channel nodes
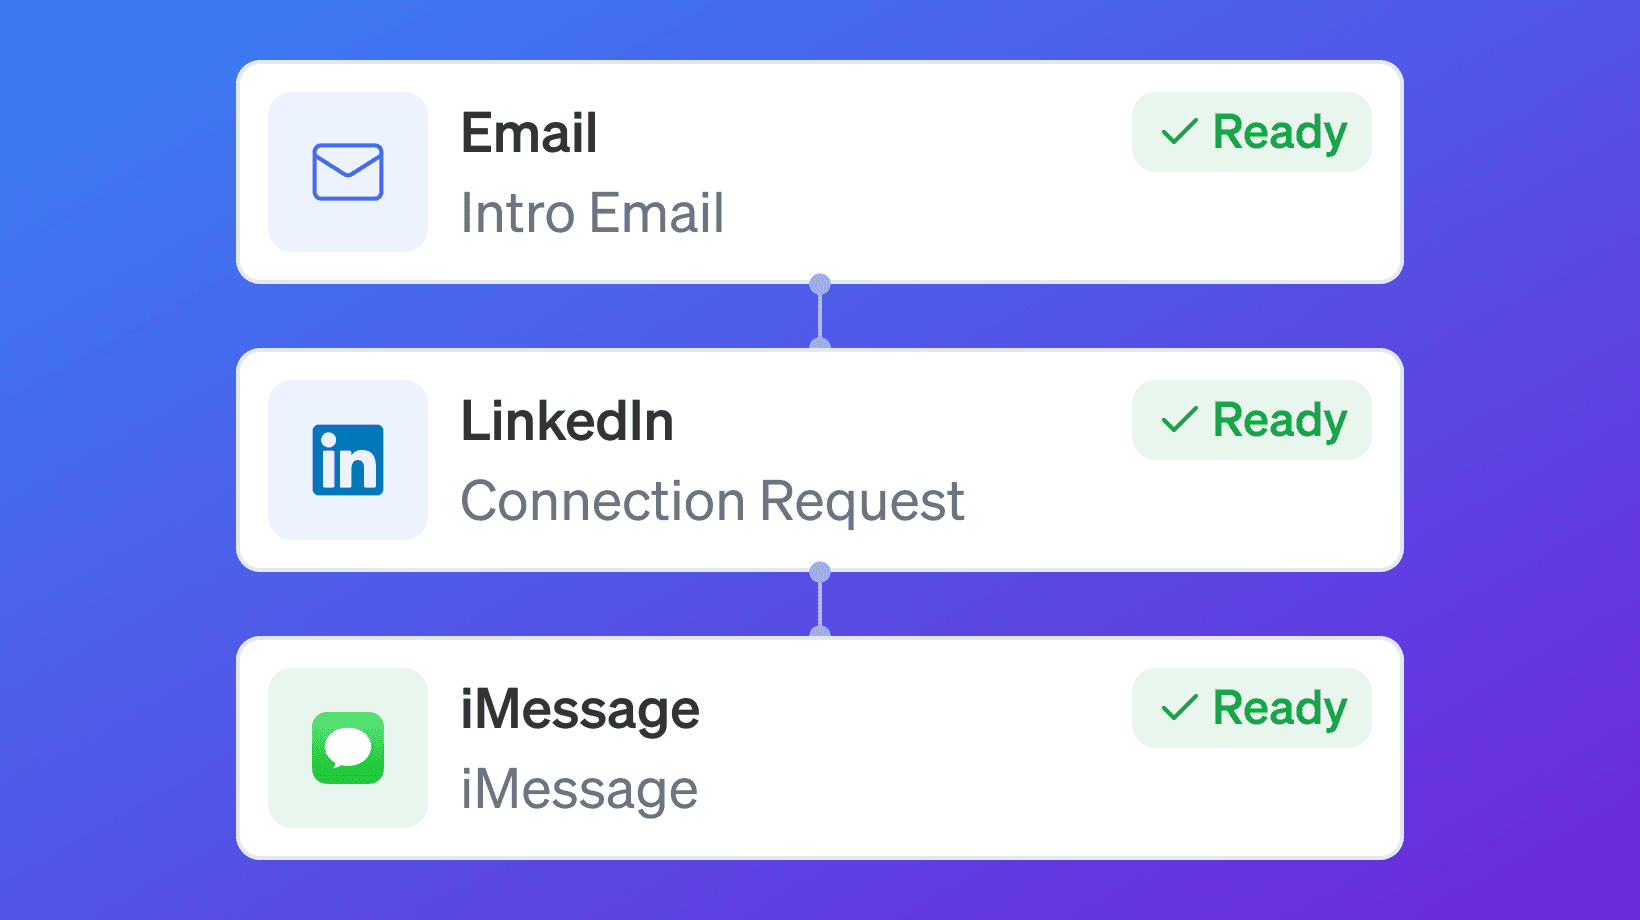
Channel nodes send messages.
1eyeᴬᴵ supports these campaign channel nodes when enabled:
Email
LinkedIn
iMessage
Each channel node needs the right sender or line selected before it can run.
If a channel is not available, check:
Workspace plan
Engagement channel enablement
User account connection
Sender availability
Contact data availability
Email node

An Email node sends an email from a connected Google Workspace Gmail mailbox.
Email nodes can be used for:
Intro emails
Follow-up emails
Final emails
ICP-specific emails
Persona-specific emails
Re-engagement messages
An Email node typically includes:
Email type
Sender
Subject
Body
Message personalization option
Wait time
Save and test options when available
Email type
Email type describes the purpose of the email step.
Examples:
Use clear email types so the workflow is easy to understand later.
Email sender
Each Email node needs a sender.
The sender must have a connected Google Workspace Gmail mailbox.
If no sender appears, check:
Email is enabled in Settings → Engagement Channels
The workspace is on a paid plan
The user has connected a Google Workspace Gmail mailbox
The mailbox shows Connected
The mailbox is within send limits
Email subject
Email nodes require a subject line.
The subject should be clear, relevant, and short.
Good examples:
Avoid vague or spammy subjects.
Weak examples:
Email body
The body is the main email message.
A good email body should:
Be concise
Reference the target contact or company when relevant
Explain why you are reaching out
Connect to the campaign purpose
Include a clear next step
Avoid sounding generic
LinkedIn node

A LinkedIn node sends a LinkedIn connection request or LinkedIn message from a connected LinkedIn account.
LinkedIn nodes can be used for:
Connection requests
Messages after a connection is accepted
Follow-up messages
Persona-specific LinkedIn messages
ICP-specific LinkedIn messages
Multi-channel reinforcement
A LinkedIn node typically includes:
LinkedIn type
Sender
Message body
Message personalization option
Wait time
LinkedIn type
LinkedIn type defines what action the node performs.
Common types include:
Use Connection Request when the target contact is not yet connected.
Use LinkedIn Message when the workflow should send a message to a contact that can receive LinkedIn messages.
LinkedIn sender
Each LinkedIn node needs a sender.
The sender must have a connected LinkedIn account.
If no sender appears, check:
LinkedIn is enabled in Settings → Engagement Channels
The workspace is on a paid plan
The user has connected LinkedIn
The LinkedIn account shows Connected
The account is within connection or message limits
LinkedIn message body
LinkedIn messages should be short and direct.
A good LinkedIn message should:
Feel natural
Be relevant to the target contact
Avoid sounding automated
Use company, persona, or signal context when useful
Have a simple next step
LinkedIn connection requests should usually be shorter than email.
iMessage node

An iMessage node sends a message from a connected iMessage-enabled line.
If the target contact does not have an iMessage-compatible device, the message may be sent as SMS.
iMessage nodes can be used for:
Direct outreach
Follow-up messages
High-intent contact follow-up
Persona-specific messaging
Multi-channel campaign steps
An iMessage node typically includes:
iMessage type
Sender line
Message body
Message personalization option
Wait time
iMessage sender
Each iMessage node needs a connected iMessage line.
If no sender line appears, check:
iMessage is enabled in Settings → Engagement Channels
The workspace is on a paid plan
An iMessage line has been requested
The line shows Connected
The target contacts have phone numbers
The line is within daily limits
iMessage body
iMessage messages should be short and specific.
A good iMessage should:
Be brief
Be relevant
Avoid long paragraphs
Use a clear reason for reaching out
Make it easy to reply
Because iMessage and SMS are direct channels, keep the message respectful and concise.
Message personalization options
Channel nodes may allow you to choose how messages are written across the audience.
Common options include:
Same message to all
Different message to each ICP
Different message to each persona
When using Different message to each ICP or Different message to each persona, a Default template is always available. The Default template is used when a contact or company does not match any defined ICP or persona. This ensures the workflow sends a message rather than skipping the contact.
Use the right option based on how broad or focused your target list is.
Same message to all
Use Same message to all when the audience is narrow and the same message makes sense for every target contact.
This works best when:
The target list has one ICP
The target list has one persona
The campaign goal is the same for everyone
The message angle is consistent
Example:
Different message to each ICP
Use Different message to each ICP when the target list includes multiple company segments.
For example, a campaign may include companies from different ICPs:
B2B SaaS Companies
Data Infrastructure Companies
Enterprise Sales Organizations
AI-Native GTM Companies
Each ICP-based message configuration includes a Default template. When a company in the target list does not match any ICP defined in your Knowledge Base, the Default template is used. This prevents the workflow from skipping the contact and ensures outreach continues for unmatched companies.
Each ICP may care about a different business problem.
Writing different messages by ICP helps the message match the company context.
Different message to each persona
Use Different message to each persona when the target list includes multiple target contact types.
For example, a campaign may include:
Revenue Operations Leader
Head of Data
VP Sales
Founder or CEO
Each persona-based message configuration includes a Default template. When a contact in the target list does not match any defined persona, the Default template is used. This prevents the workflow from skipping the contact and ensures outreach continues for unmatched contacts.
Each persona cares about different outcomes.
A RevOps leader may care about routing, enrichment, and CRM quality.
A Head of Data may care about data quality, activation, and governance.
A Founder may care about growth, efficiency, and team leverage.
Different persona messages help avoid generic outreach.
Editing messages
When you select Edit on a message node, you can write or update the message content.
For Email, you typically need:
Sender
Subject
Body
For LinkedIn, you typically need:
Sender
Message body
For iMessage, you typically need:
Sender line
Message body
Make sure every message is complete before launching the campaign.
Variables

Messages may support variables.
Variables help insert contact, company, sender, or campaign context into the message.
Examples may include:
First name
Company name
Title
Industry
Sender name
Signal context when available
Use variables carefully.
A good variable makes the message more relevant.
A broken or missing variable makes the message feel automated.
Test messages
When available, use test message options before launch.
Testing helps confirm:
Sender is selected
Subject looks right
Variables render correctly
Message body is formatted correctly
Links work
The message does not look broken
Do not launch a campaign without reviewing the actual message content.
Wait time
Channel nodes can include a wait setting.
Wait time controls how long 1eyeᴬᴵ waits before moving to the next step.
Examples:
Use wait times to avoid sending too many messages too quickly.
A workflow with wait steps feels more natural and gives target contacts time to respond.
Signal node

A Signal node checks whether a condition happened.
Signal nodes help workflows branch based on target contact or target company activity.
A signal node can create a Yes path and a No path.
Example:
Signal nodes make workflows adaptive.
Signal conditions
Signal conditions may include:
If email opened
If website visited
If ICP
If LinkedIn accepted
These conditions let the workflow react to activity and fit.
If email opened
Use If email opened when you want to check whether the target contact opened an email.
Example:
Email opens can be useful, but they are not perfect. Some opens may not be tracked because of email client privacy settings.
Replies are usually more important than opens.
If website visited
Use If website visited when you want to check whether a target contact or company visited your website.
Example:
Website visits can indicate interest, especially when the visit is recent or tied to a high-intent page.
If ICP
Use If ICP when you want to branch based on whether the company matches an ICP from your Knowledge Base.
Example:
This helps keep campaigns focused on target companies that match your strategy.
If LinkedIn accepted
Use If LinkedIn accepted when you want to check whether a LinkedIn connection request was accepted.
Example:
This is useful for multi-channel campaigns where LinkedIn messaging should happen only after the connection is accepted.
Yes and No branches
Signal nodes create two possible paths:
Yes
The condition happened.No
The condition did not happen.
Use the Yes branch for higher-intent or matching contacts.
Use the No branch for fallback steps, wait steps, different channels, or ending the path.
Example:
Every Yes and No branch should eventually connect to another node or an End node.
Branching best practices
Use branching when different behavior should lead to different next steps.
Good branching examples:
If LinkedIn accepted, send LinkedIn message
If email opened, send a more specific follow-up
If website visited, prioritize the contact
If ICP, continue outreach
If not ICP, end the sequence
If no response, send a final email
Avoid overcomplicating workflows with too many branches before you have enough campaign data.
Message limits
Message limits apply to campaign workflow execution.
Limits can come from:
Workspace plan
Connected channel limits
Mailbox send limits
LinkedIn connection limits
LinkedIn message limits
iMessage new conversation limits
User sending schedule
Contact-level rules
If a workflow step is not sending, check limits first.
Email limits
Email sends depend on the connected mailbox limit.
The maximum email send limit is:
Your team may choose a lower limit.
Email steps also depend on:
Contact has email
Contact status is Target
Sender mailbox is connected
User schedule allows sending
Mailbox has remaining capacity
LinkedIn limits
LinkedIn steps depend on connected account limits.
Limits may include:
Daily connection requests
Weekly connection requests
Monthly connection requests
Daily messages
Weekly messages
Monthly messages
LinkedIn steps also depend on:
Contact has LinkedIn profile
Contact status is Target
Sender LinkedIn account is connected
User schedule allows sending
LinkedIn account has remaining capacity
iMessage limits
iMessage steps depend on the connected iMessage line limit.
Limits may include:
New conversations per day
Plan-level iMessage line limits
Campaign-level controls when available
iMessage steps also depend on:
Contact has phone number
Contact status is Target
iMessage line is Connected
Line has remaining capacity
Message can be sent as iMessage or SMS fallback
Contact status requirements
Campaign outreach should only run for contacts in Target status.
Before launch, review that target contacts are not:
Excluded
Archived
Converted
In the wrong status for campaign outreach
Excluded contacts should not receive outreach.
Workflow save
After changing a workflow, save the workflow.
If the campaign is already running, workflow changes may apply only to future steps.
Always save after:
Adding a node
Removing a node
Editing message content
Changing wait time
Changing a signal condition
Changing branches
Changing senders
If you see a warning that the workflow was updated, save to apply the changes.
View Console
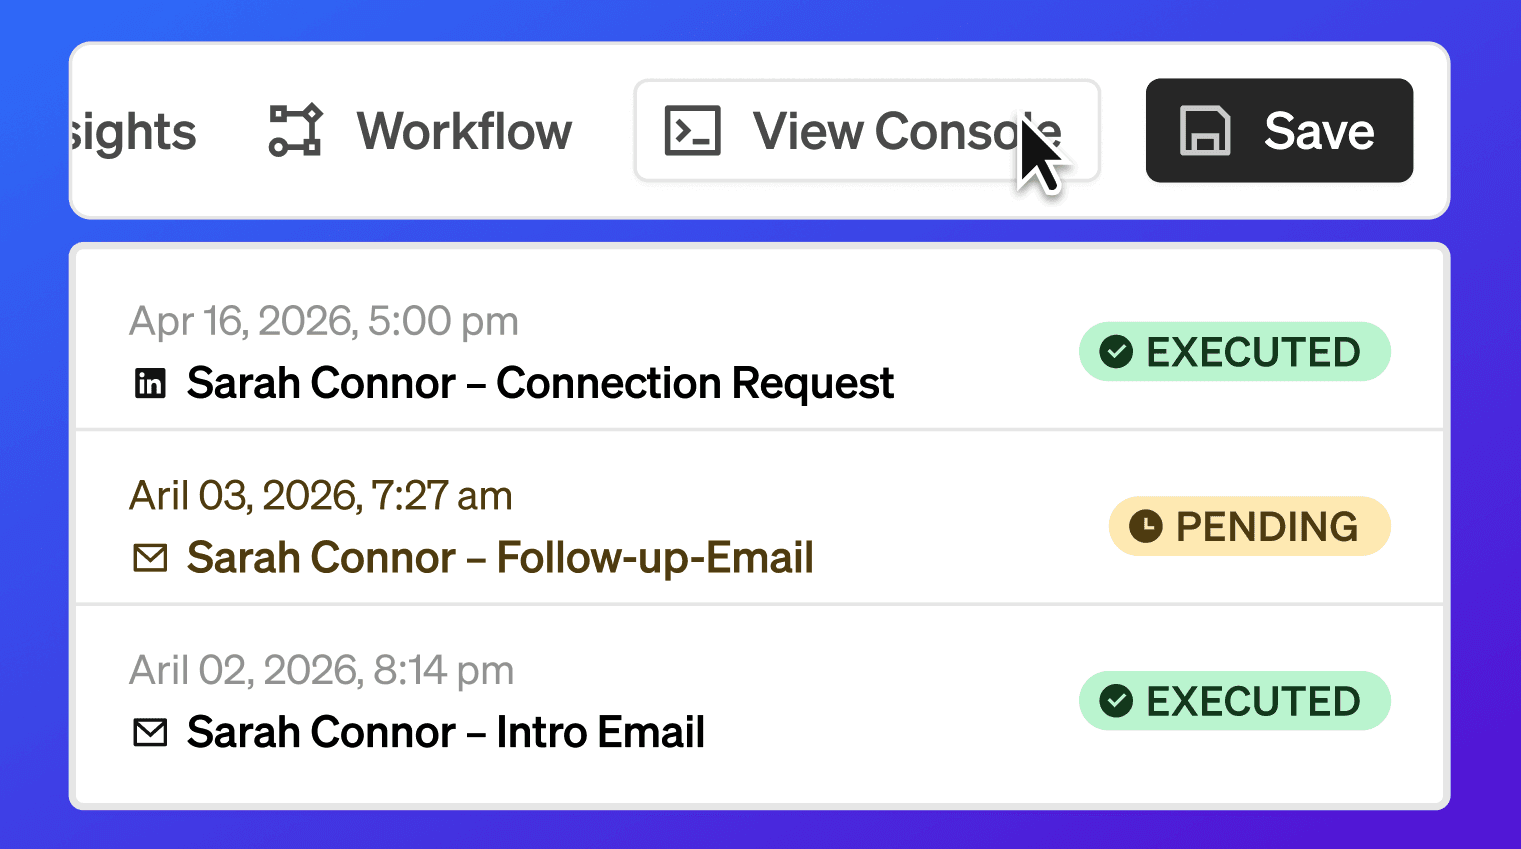
The Workflow tab may include a View Console button.
Use Console to inspect campaign execution.
Console helps you see:
Executed steps
Pending steps
Failed steps
Which contact is on which node
Which node ran
When it ran
What is scheduled next
Message details
Use Console after launch to understand what is actually happening.
Workflow examples
Simple email campaign
Use this when you want a basic email sequence.
Email plus LinkedIn campaign
Use this when LinkedIn should support email outreach.
Signal-based website follow-up
Use this when website activity should change the next step.
ICP-based campaign
Use this when only ICP-fit companies should continue through outreach.
iMessage follow-up campaign
Use this when phone data is available and iMessage is enabled.
Recommended workflow setup
Use this workflow when building a campaign.
Open the campaign
Go to Workflow
Review the Start and End nodes
Add the first channel node
Select the node type
Select the sender
Write the message
Add wait time
Add the next node
Add signal conditions if needed
Connect Yes and No branches
Review every path
Save the workflow
Preview or launch the campaign
Recommended message setup
Use this workflow when writing messages.
Select the message node
Choose the message type
Choose same message, ICP-specific message, or persona-specific message
Select sender
Add subject if it is an email
Write the body
Add variables only where useful
Review formatting
Test if available
Save
Recommended signal setup
Use this workflow when adding a signal condition.
Add a Signal node
Select the signal condition
Connect the previous node into the Signal node
Connect the Yes branch
Connect the No branch
Add wait time before the signal if needed
Confirm both branches lead to valid next steps
Save the workflow
Best practices
Start simple
Use a clean workflow before building complex branches.Use the right channel for the right step
Email, LinkedIn, and iMessage should each have a purpose.Select senders early
Missing senders can block workflow execution.Write messages by ICP or persona when needed
Better context usually creates better replies.Use wait steps
Give target contacts time before the next message.Use signal branches intentionally
Branch only when the next action should actually change.Keep every path connected
Yes and No branches should not lead nowhere.Make sure every path ends
Each workflow path should eventually reach an End node.Review limits before launch
Channel limits affect workflow execution.Use Console after launch
The Console shows what ran, what is pending, and what failed.Pause before making major changes
If a running workflow needs major edits, pause and review first.Save after every meaningful change
Unsaved workflow changes may not apply.Do not over-message
A thoughtful sequence beats a long, noisy sequence.Respect negative replies and exclusions
Do not continue outreach to contacts who should not receive messages.
Troubleshooting
I do not see a channel node
Check:
Workspace is on a paid plan
Channel is enabled in Settings → Engagement Channels
Sender account or line is connected
Plan includes the channel
User has permission
Contacts have the required channel data
Email node is not working
Check:
Email is enabled
Sender mailbox is connected
Contact has an email address
Contact status is Target
Mailbox has remaining send limit
User schedule allows sending
Email subject and body are complete
LinkedIn node is not working
Check:
LinkedIn is enabled
Sender LinkedIn account is connected
Contact has a LinkedIn profile
Contact status is Target
LinkedIn account has remaining limits
User schedule allows sending
The LinkedIn action type is correct
iMessage node is not working
Check:
iMessage is enabled
iMessage line is Connected
Contact has a phone number
Contact status is Target
Line has remaining daily capacity
Message body is complete
iMessage or SMS delivery is available
Signal condition is not branching
Check:
The correct signal condition is selected
There is enough wait time before the signal check
The signal actually occurred
The Yes branch is connected
The No branch is connected
The workflow is saved
LinkedIn accepted condition is not working
Check:
A LinkedIn connection request step exists before the signal
The contact has a LinkedIn profile
The LinkedIn account is connected
The workflow waits long enough before checking
The connection request was actually accepted
The Yes and No branches are connected
Website visited condition is not working
Check:
Website Signals are active
The Vision snippet is installed
The contact or company visit is captured
The workflow waits long enough before checking
The signal condition is saved correctly
Email opened condition is not working
Check:
Email was sent
Open tracking is available
Recipient privacy settings are not blocking tracking
The workflow waits long enough before checking
The Yes and No branches are connected
Workflow changes are not applying
Check:
You saved the workflow
The campaign is not paused or ended
The change applies to future steps
The node is connected correctly
Console does not show failed steps
A contact reached the wrong branch
Review:
Signal condition
Timing
Contact activity
Available signals
Workflow save state
Console execution log
Workflow is running but nothing is happening
Check:
Campaign status is Running
Contacts are in Target status
Contacts have required channel data
Workflow has connected paths
Wait steps are not still pending
Channel limits are available
Console does not show failures
A node failed
Open Console and inspect the failed node.
Common causes include:
Missing sender
Missing email
Missing LinkedIn profile
Missing phone number
Disconnected account
Channel disabled
Send limit reached
Contact not in Target status
Message content missing
Workflow not saved
FAQ
What is a workflow?
A workflow is the sequence of campaign steps that controls messages, channels, wait times, signal checks, branches, and end states.
What channels can workflows use?
Workflows can use Email, LinkedIn, and iMessage when those channels are enabled and connected.
Why do I only see some channel nodes?
Only enabled and connected channels are available.
What does an Email node do?
An Email node sends an email from a connected Google Workspace Gmail mailbox.
What is the Default template in an Email node?
The Default template is a fallback email used when a contact or company does not match any ICP or persona configured in the Email node. It ensures the workflow sends an email rather than skipping the contact during execution.
When does the Default email template get used?
The Default template is used when Different email to each ICP or Different email to each persona is selected and the target contact or company does not match any of the defined ICP or persona options. Without a Default template, the contact would be skipped at that step.
What does a LinkedIn node do?
A LinkedIn node sends a LinkedIn connection request or LinkedIn message from a connected LinkedIn account.
What is the Default template in a LinkedIn node?
The Default template is a fallback message used when a contact or company does not match any ICP or persona configured in the LinkedIn node. It ensures the workflow sends a LinkedIn message rather than skipping the contact during execution.
When does the Default LinkedIn template get used?
The Default template is used when Different message to each ICP or Different message to each persona is selected and the target contact or company does not match any of the defined ICP or persona options. Without a Default template, the contact would be skipped at that step.
What does an iMessage node do?
An iMessage node sends an iMessage from a connected iMessage line. If iMessage is not available for the target contact, the message may be sent as SMS.
Does every node need a sender?
Channel nodes need a sender or line. Email needs a connected mailbox, LinkedIn needs a connected LinkedIn account, and iMessage needs a connected iMessage line.
Does email need a subject?
Yes. Email messages need a subject and body.
Do LinkedIn and iMessage need a subject?
No. LinkedIn and iMessage messages use a message body.
Can I write different messages by ICP?
Yes. Use different messages by ICP when the campaign includes multiple company segments.
Can I write different messages by persona?
Yes. Use different messages by persona when the campaign includes multiple target contact types.
What is a Signal node?
A Signal node checks whether a condition happened and branches the workflow into Yes or No paths.
What signal conditions are available?
Signal conditions may include email opened, website visited, ICP match, and LinkedIn accepted.
What is the Yes branch?
The Yes branch runs when the signal condition is true.
What is the No branch?
The No branch runs when the signal condition is false.
What is Wait For?
Wait For controls how many days 1eyeᴬᴵ waits before moving to the next workflow step.
Do message limits apply to workflows?
Yes. Email, LinkedIn, and iMessage steps are subject to channel, sender, line, plan, and schedule limits.
Do I need to save the workflow?
Yes. Save workflow changes so they apply to the campaign.
Where do I see what happened?
Use Console to view executed, pending, and failed workflow steps.
Next step
Next, go to Console to learn how to monitor campaign execution, inspect node status, and troubleshoot running campaigns.